Introduction
This blog post will guide you through creating and deploying a C# function to Azure using command-line tools. This article will walk you through creating an HTTP-triggered function that runs on .NET 8 in an isolated worker process. By the end of this post, you will have a functional Azure Function that responds to HTTP requests.
Objective
In this article, you will:
- Install the Azure Functions Core Tools.
- Create a C# function that responds to HTTP requests.
- Test the function locally.
- Deploy the function to Azure.
- Access the function in Azure.
Prerequisites
Ensure you have the following installed:
- Azure CLI (version 2.4 or later)
- .NET SDK (version 6.0 and 8.0)
- Azure Functions Core Tools (version 4.x)
- Uninstall previous versions (if any):
- Open the Settings from the Start menu.
- Select Apps.
- Click on Installed apps.
- Find Azure Function Core Tools, click the three dots next to it, and select Uninstall.
- Install the latest version:
Step 1: Prerequisite Check
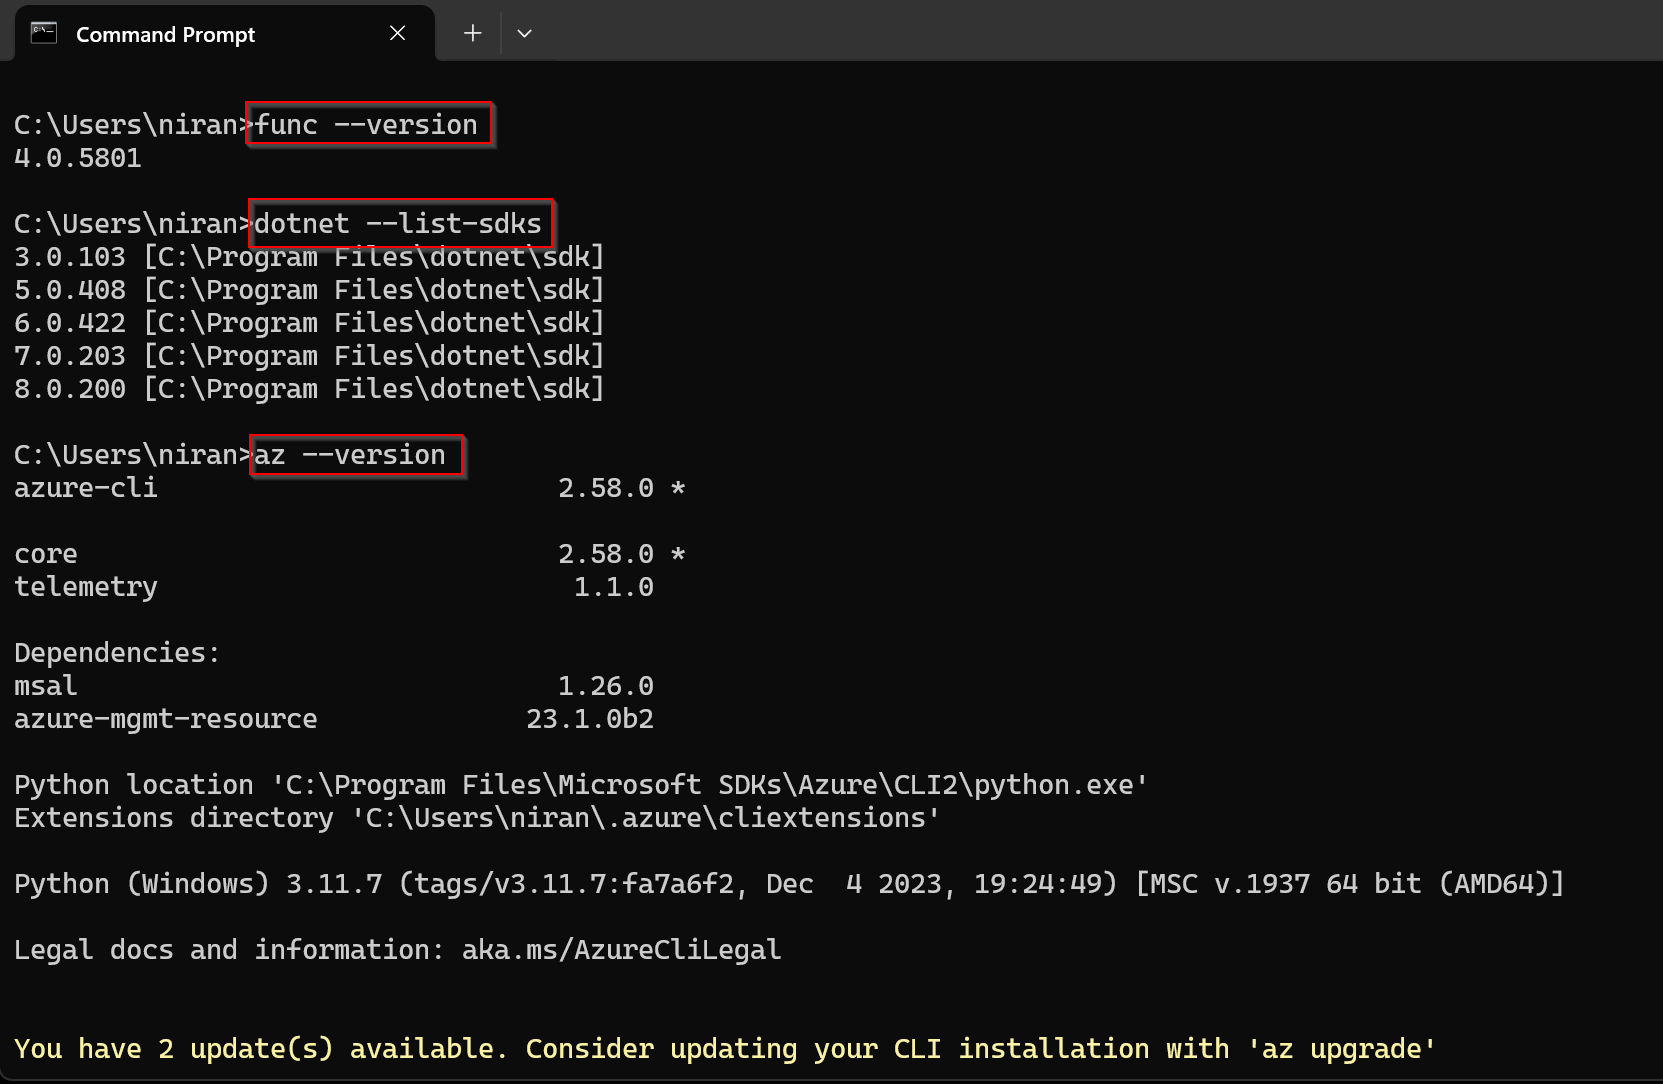
- Open Command Prompt and execute the following commands to verify your setup:
func --version – This is to check that the Azure Functions Core Tools are version 4.x.dotnet --list-sdks – This checks that the required versions are installed. It should be 6.0 and 8.0az --version to check that the Azure CLI version is 2.4 or later.
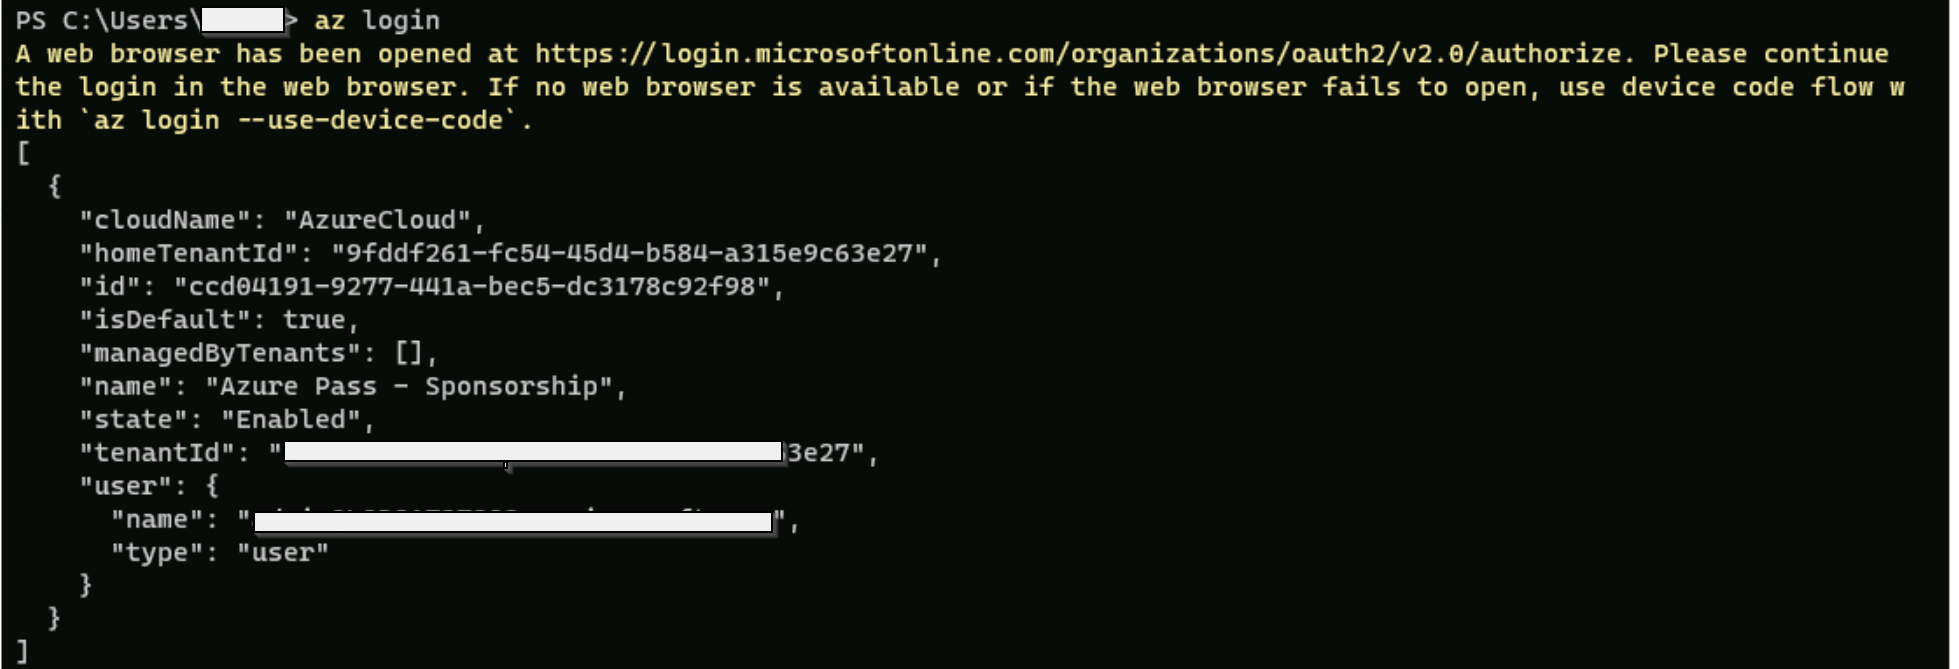
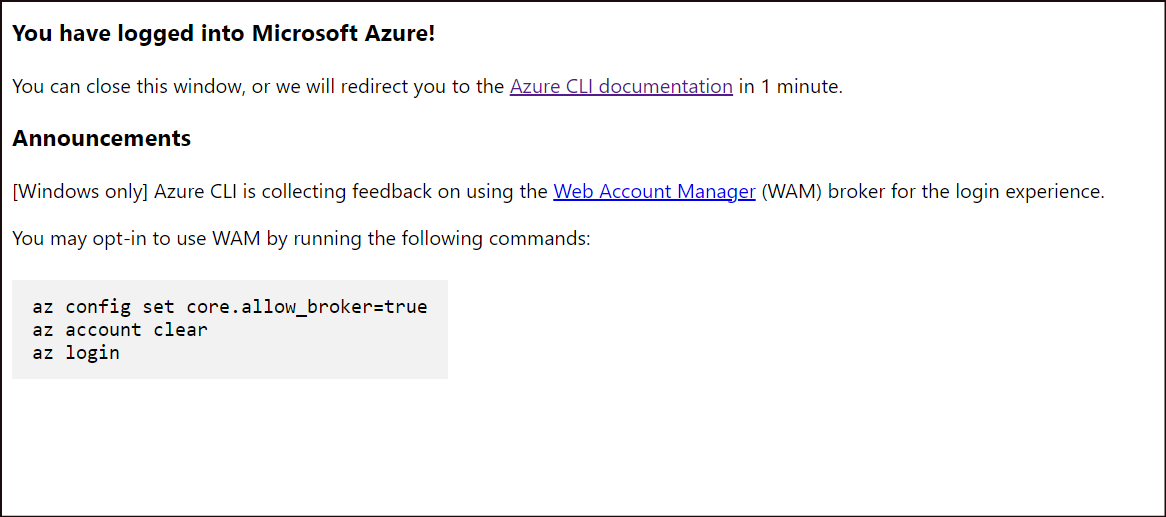
az login to sign in to Azure and verify an active subscription. Select your login in the browser that opens up. Log in to Azure when prompted:
- A browser window will open. You can just select your Azure account to sign in.
- The command prompt will display your Azure login details.
Step 2: Create a Local Function Project
- Initialize the function project: Run the func init command, as follows, to create a functions project in a folder named LocalFunctionProj with the specified runtime:
func init LocalFunctionProj --worker-runtime dotnet-isolated --target-framework net8.0
cd LocalFunctionProj
This folder contains various files for the project, including configuration files named local.settings.json and host.json. Because local.settings.json can contain secrets downloaded from Azure, the .gitignore file excludes it from source control by default.

- Add a new HTTP-triggered function:
func new --name HttpExample --template "HTTP trigger" --authlevel "anonymous"

- Examine the generated code:
 using Microsoft.Azure.Functions.Worker;
 using Microsoft.Extensions.Logging;
 using Microsoft.AspNetCore.Http;
 using Microsoft.AspNetCore.Mvc;

 namespace LocalFunctionProj
 {
     public class HttpExample
     {
         private readonly ILogger<HttpExample> _logger;

         public HttpExample(ILogger<HttpExample> logger)
         {
             _logger = logger;
         }

         [Function("HttpExample")]
         public IActionResult Run([HttpTrigger(AuthorizationLevel.Anonymous, "get", "post")] HttpRequest req)
         {
             _logger.LogInformation("C# HTTP trigger function processed a request.");
             return new OkObjectResult("Welcome to Azure Functions!");
         }
     }
 }

Step 3: Run the Function Locally
- Start the local Azure Functions runtime host: Run your function by starting the local Azure Functions runtime host from the LocalFunctionProj folder:
The output says that the worker process started and initialized. The function’s URL is also displayed.
- Test the function:
- Copy the URL from the output and paste it into a browser.
- You should see a message: “Welcome to Azure Functions!”

- Stop the function host:
- Press
Ctrl+C and confirm with y.
Step 4: Create Supporting Azure Resources
Before you can deploy your function code to Azure, you need to create three resources:
-
A resource group, which is a logical container for related resources.
-
A Storage account, which is used to maintain state and other information about your functions.
-
A function app, which provides the environment for executing your function code. A function app maps to your local function project and lets you group functions as a logical unit for easier management, deployment, and sharing of resources.
You can use the following commands to create these items. Both Azure CLI and PowerShell are supported.
-
Sign in to Azure:
If you haven’t done so, sign in to Azure: The az login command signs you into your Azure account.
az login
-
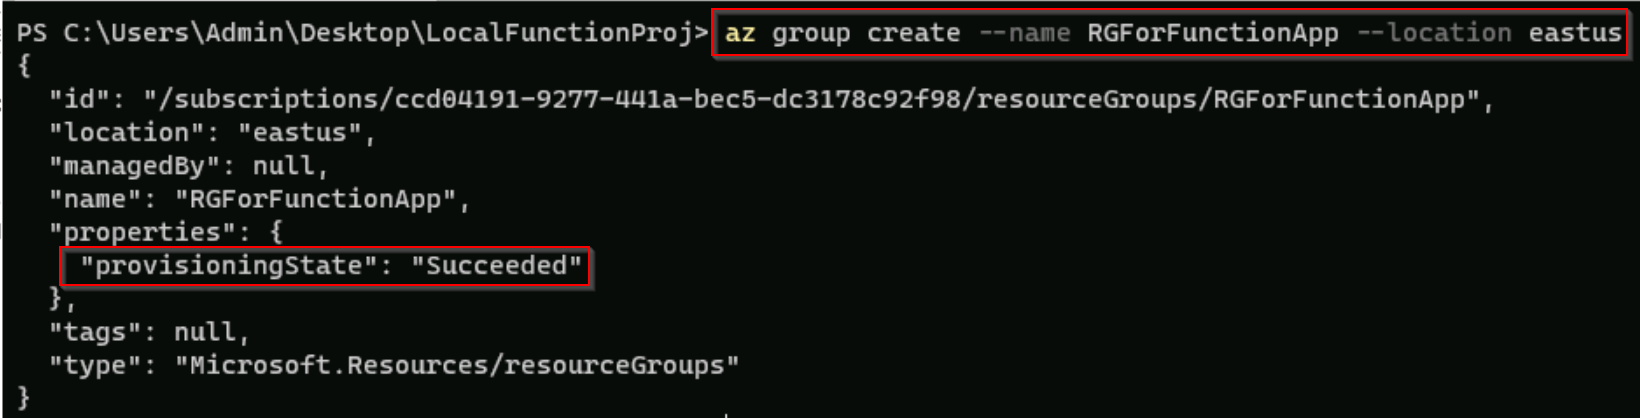
Create a resource group:
Create a resource group named RGForFunctionApp in your chosen region:
az group create --name RGForFunctionApp --location eastus
The az group create command creates a resource group and populates the command shell with the created RG details with the Provisioning state - Succeeded
-
Create a storage account:
Create a general-purpose storage account in your resource group and region.
az storage account create --name storaccforazfunc07 --location eastus --resource-group RGForFunctionApp --sku Standard_LRS --allow-blob-public-access false
The az storage account create command creates a storage account named storaccforazfunc07 in the EastUS region. The details are populated in the command prompt, and the provisioning state is succeeded.


-
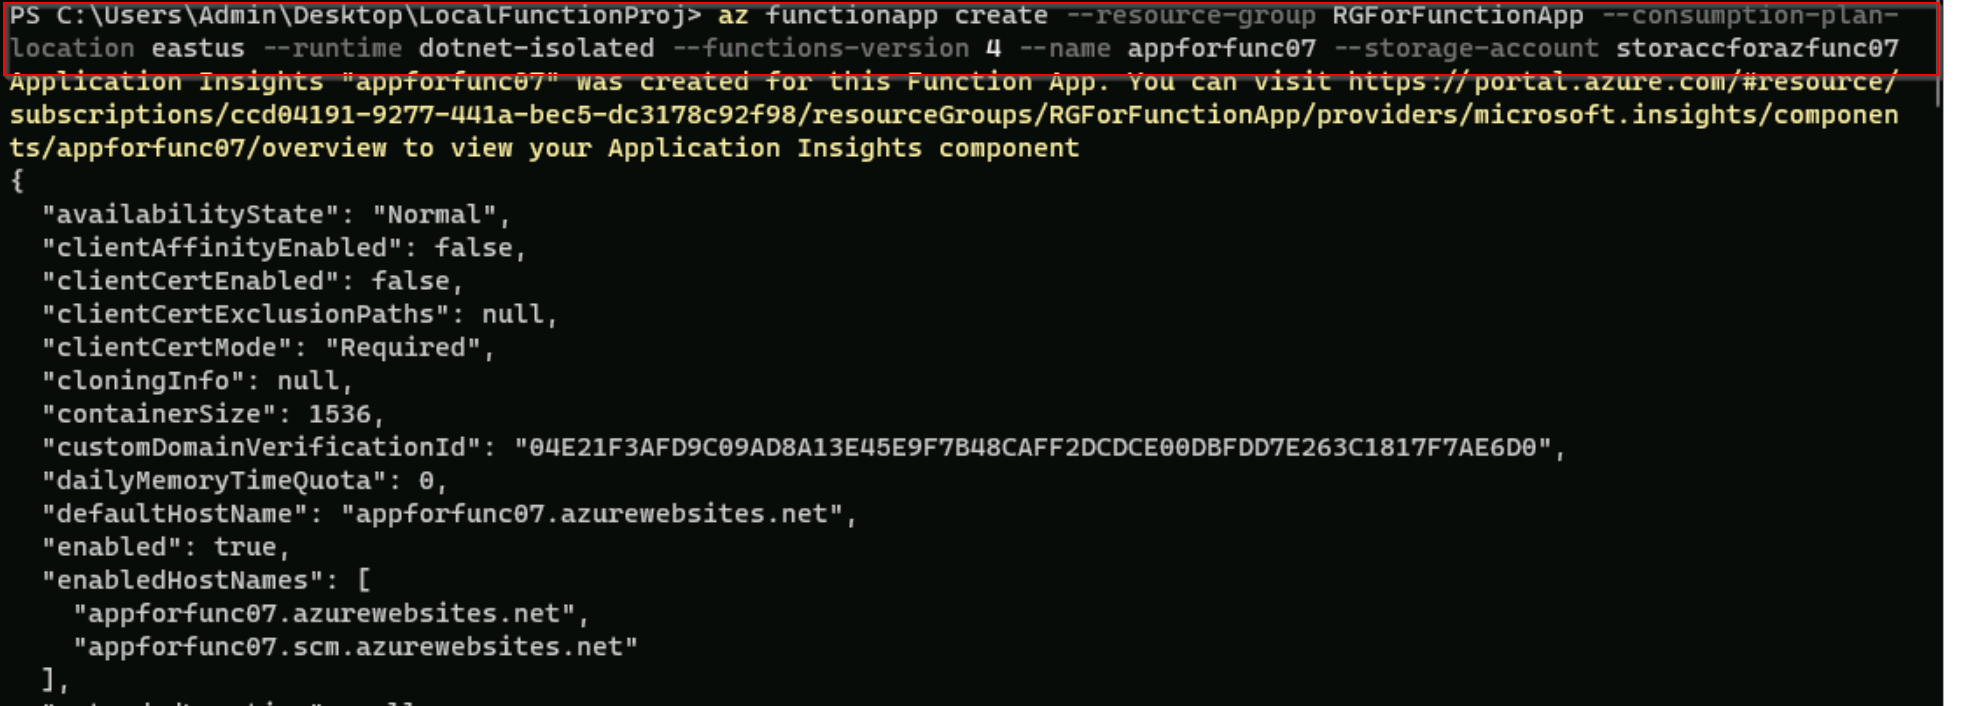
Create the function app:
Create the function app in Azure: Execute the below command:
az functionapp create --resource-group RGForFunctionApp --consumption-plan-location eastus --runtime dotnet-isolated --functions-version 4 --name appforfunc07 --storage-account storaccforazfunc07
The az functionapp create command creates the function app in Azure.

Step 5: Deploy the Function Project to Azure
After successfully creating your function app in Azure, you’re ready to deploy your local functions project using the func azure functionapp publish command.
- Deploy the function:
func azure functionapp publish appforfunc07
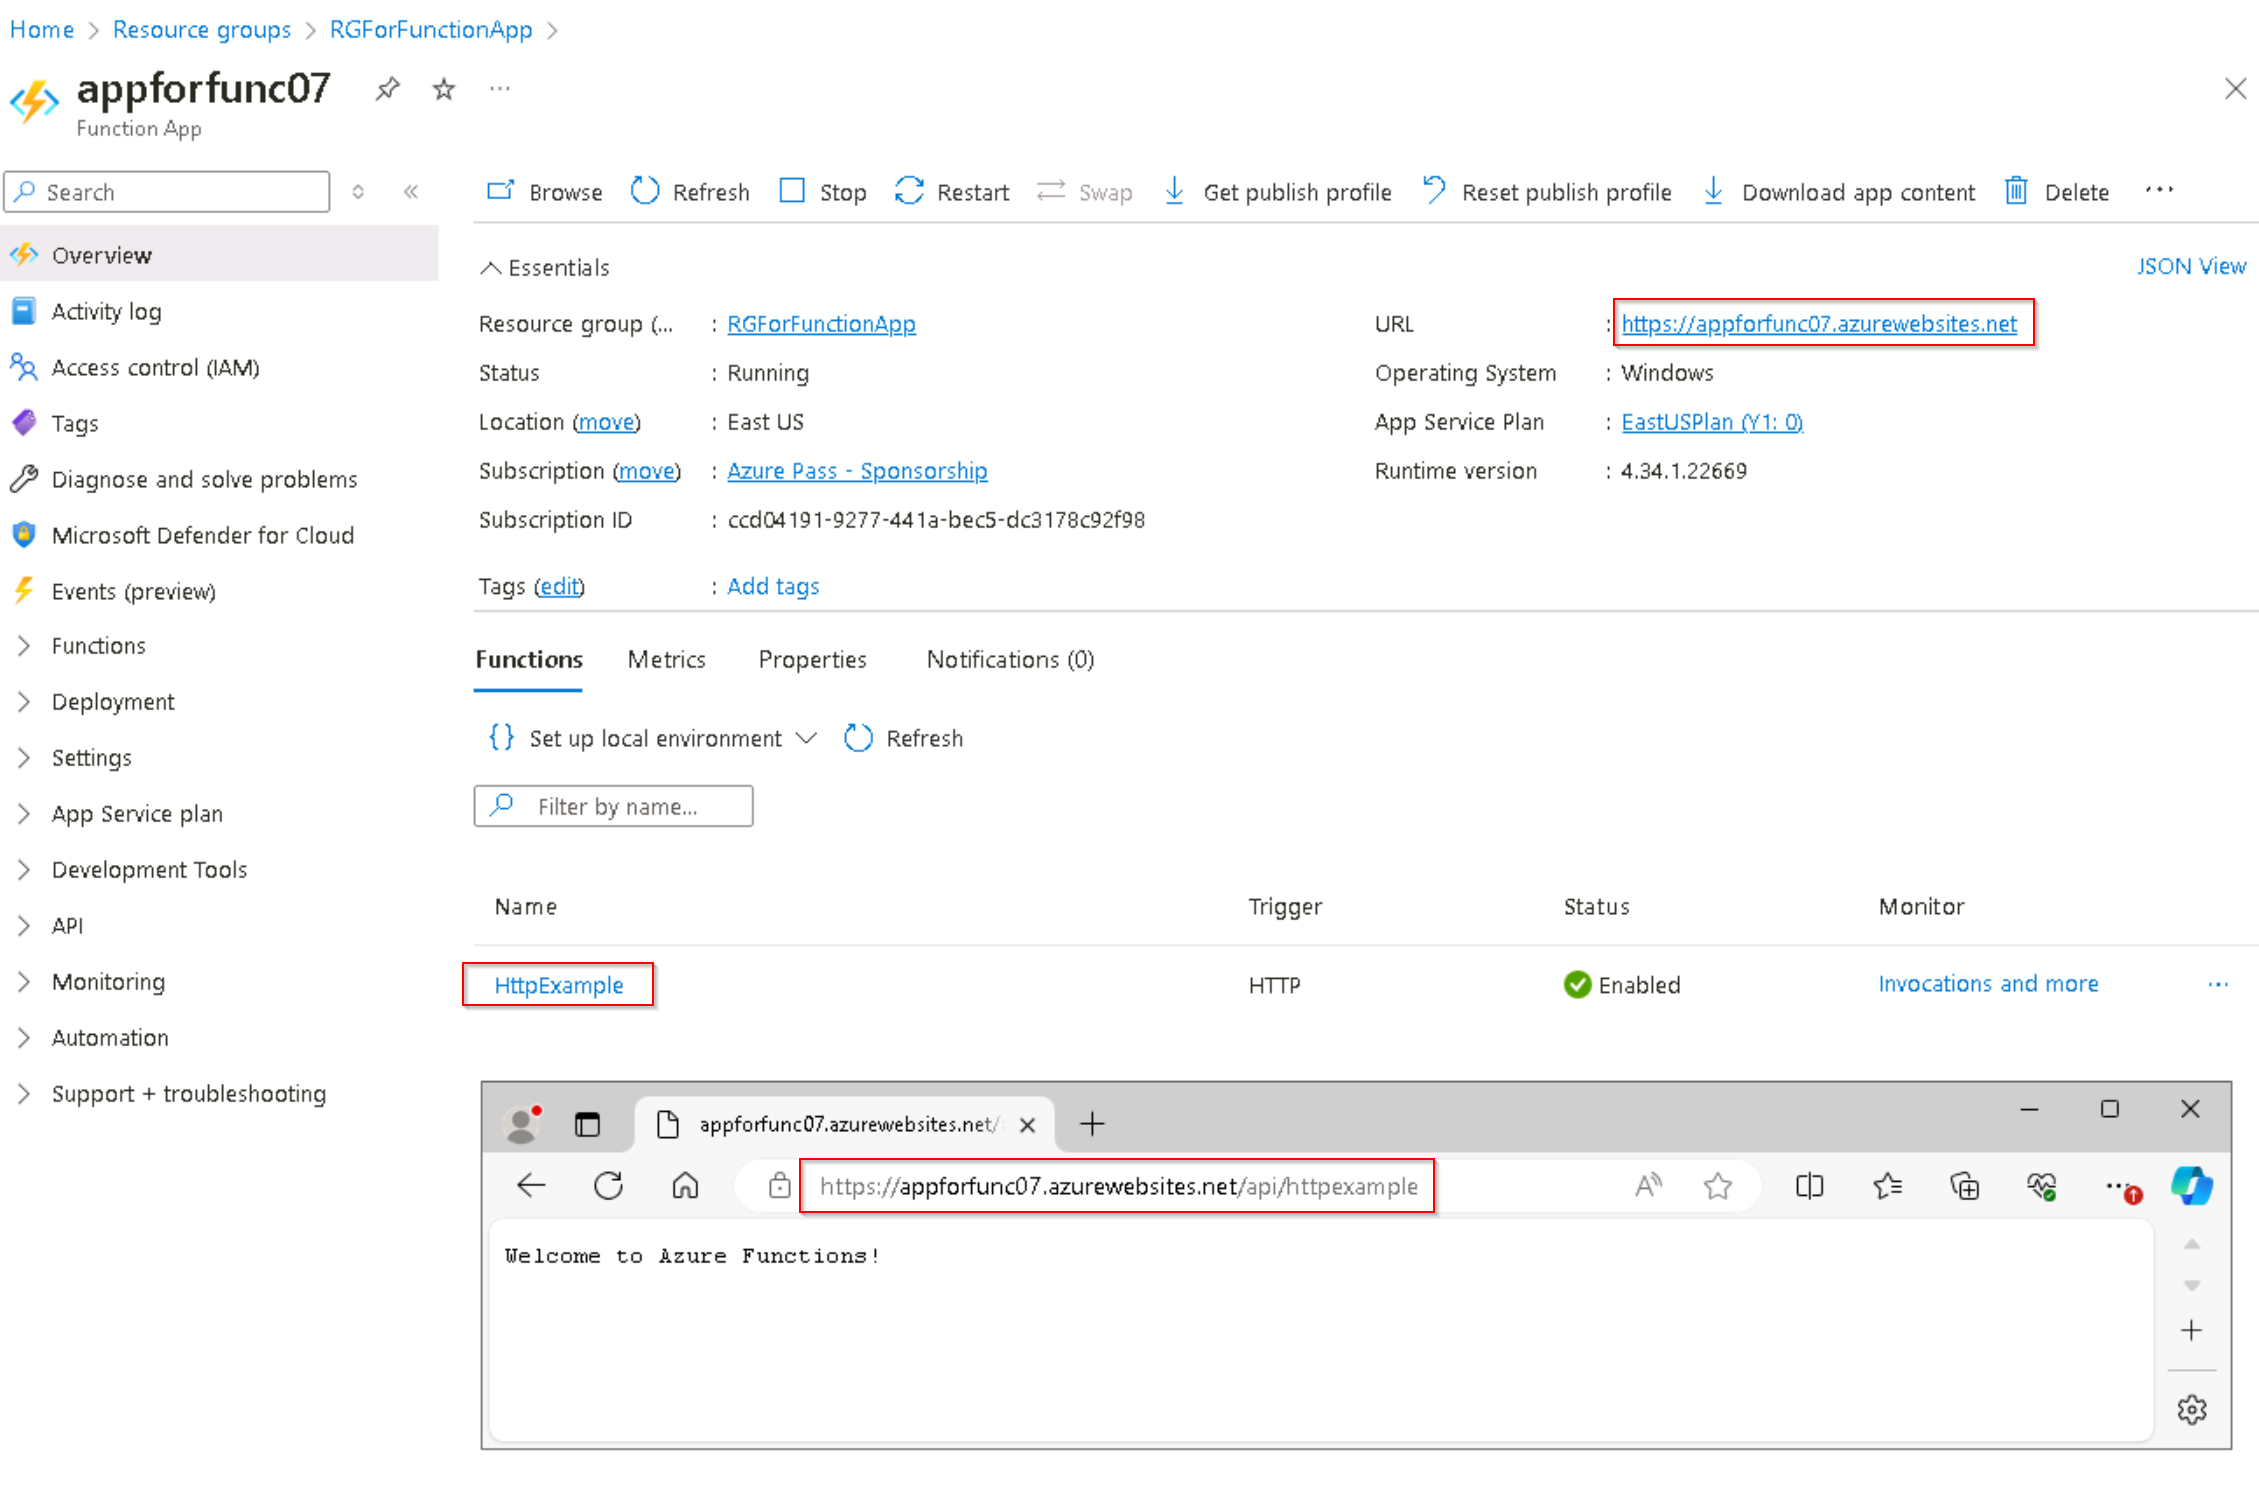
After deployment, a URL will be provided. This is the Invoke URL for your function.

Step 6: Invoke the Function on Azure
- Invoke the function using a browser:
- Copy the Invoke URL and paste it into a browser.
- You should see the same “Welcome to Azure Functions!” message.
-
View real-time logs:
Call the remote function again in a separate terminal window or in the browser. The terminal shows a verbose log of the function’s execution in Azure.
func azure functionapp logstream appforfunc07
- Open another terminal or browser window and call the function URL again to see the real-time logs.
- Press
Ctrl+C to end the logstream session.
Step 7: Clean Up Resources
-
Delete the resource group:
Execute the following command to delete the resource group and all its contained resources. Confirm if you want to perform this operation and hit Enter.
az group delete --name RGForFunctionApp
Conclusion
Congratulations! Using command-line tools, you’ve successfully created, tested, and deployed a C# function to Azure. This step-by-step guide has walked you through installing necessary tools, setting up a local development environment, creating and running a function locally, deploying it to Azure, and finally cleaning up the resources. Azure Functions provides a robust, serverless compute environment to build and quickly deploy scalable, event-driven applications. Happy coding!